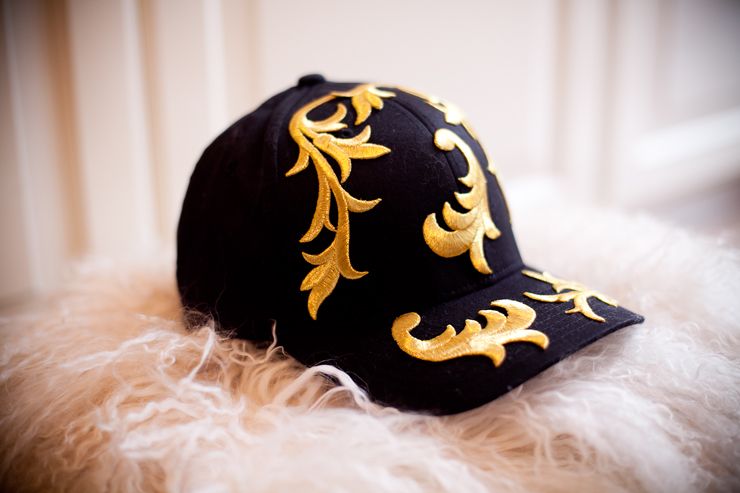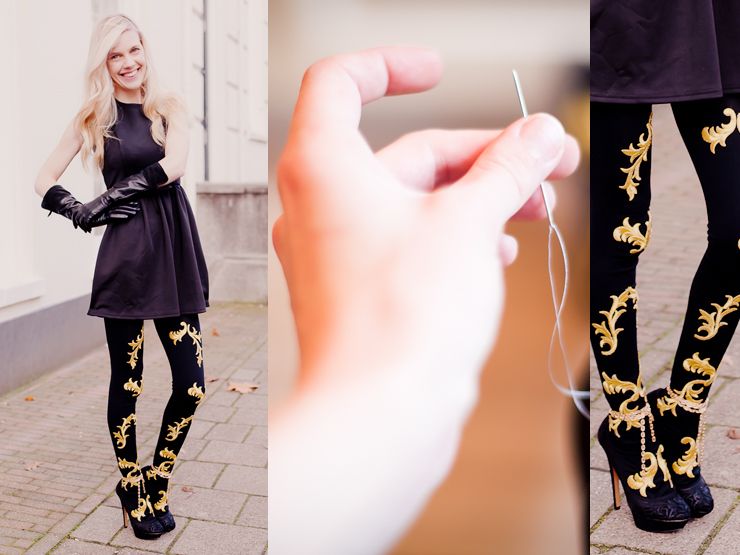
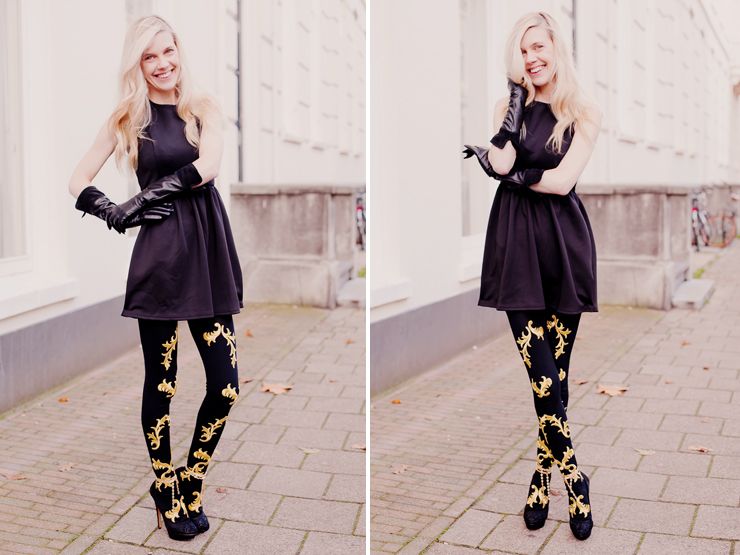
 photo's me and D&G fall winter 2012/2013As Promised! The Tutorial for the DIY Baroque Tights! Hope you like it!xoxoYou can totally apply this DIY to other items as well! 1) What You Need1) Tights, I used H&M tights of about 60 denier!2) Needle, Thread (metallic Thread, Gold or gold colored is preferred), pins, scissors, scotch tape3) Baroque (cornelli) Motifs, these are mostly Iron-On's although sewing is better for a more beautiful look.I used 2 kinds of Cornelli Motifs from Barnett Lawson Trimmings in London, both Gold colored, online here and here.
*
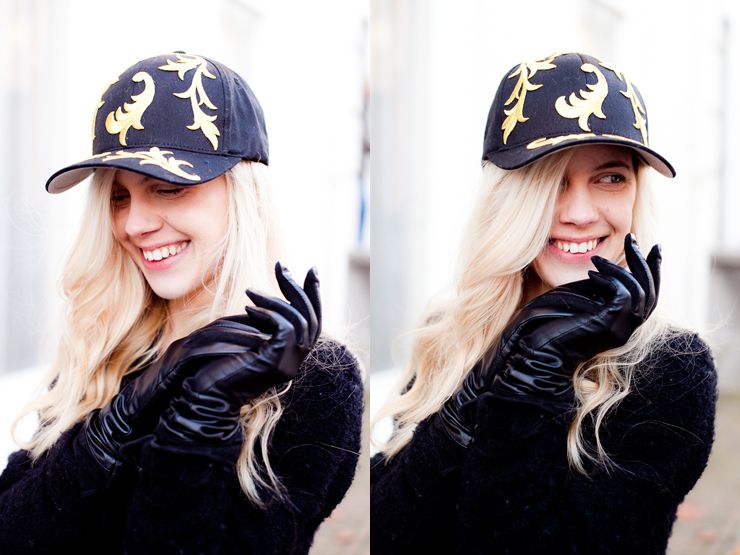
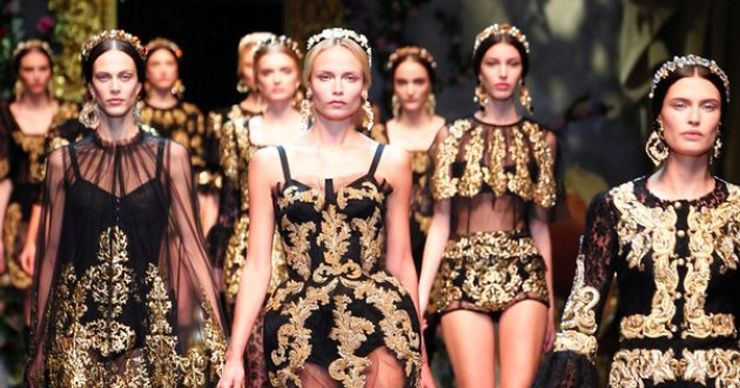
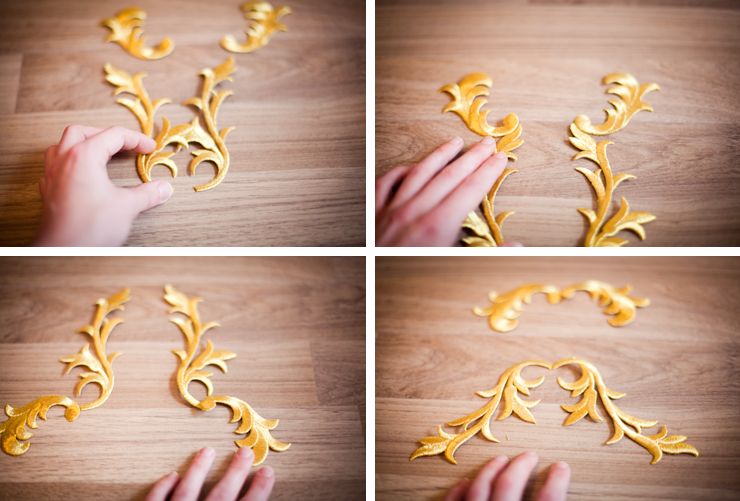
If preferred, instead of sewing you would need an Iron or Glue (Pattex Glue or Fabric Glue only when making the Motifs yourself since the Cornelli Motifs are Iron On and thus the glue side is platic-like instead of fabric!) You can make Motifs yourself by Spray Painting (gold) felt fabric. 2) Placement PracticeBefore we even begin it's very important you understand how the Baroque Motifs and Prints work! Look closely at my finished tights and to the D&G collection and you will see the placement is symmetric, kind of mirror reflecting! The Cornelli Trimmings I bought (seen below) at Barnett Lawson come in a set so if you decide to make your own trimmings make sure you have a left and right version as well!
 Now start playing a bit with all the possible Motifs/Prints you can make to get a good feel of the trend and don't be afraid to look at existing prints! Make sure you work in a symmetrical way, always mirror reflecting the left and right side!
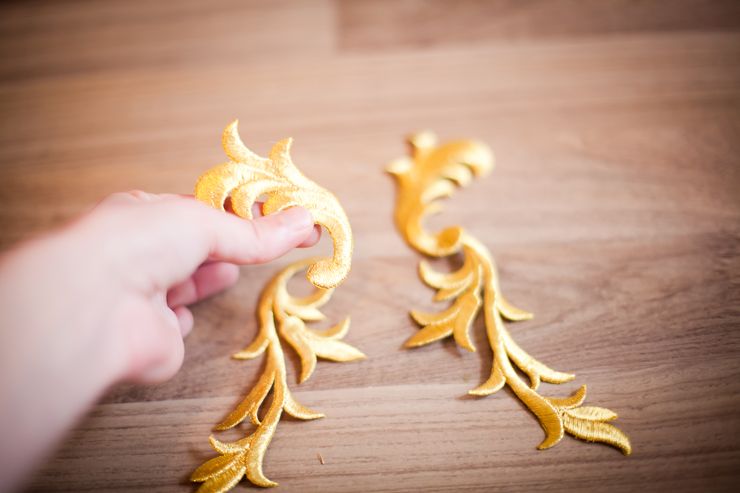
 3) Wear the TightsReady with the Practice? Wear the tights or if you prefer this DIY on a Tee or Skirt, wear those items so we can have a look of where exactly we want to place the Motifs!
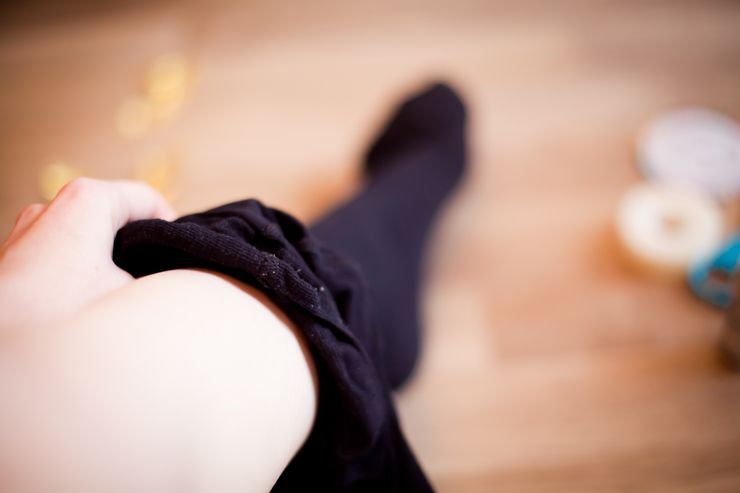 4) PlacementStay very close to a mirror so you can see what you do! Place the Motifs on the tights how you like it, play a bit with the placements you have practiced and work symmetrical!
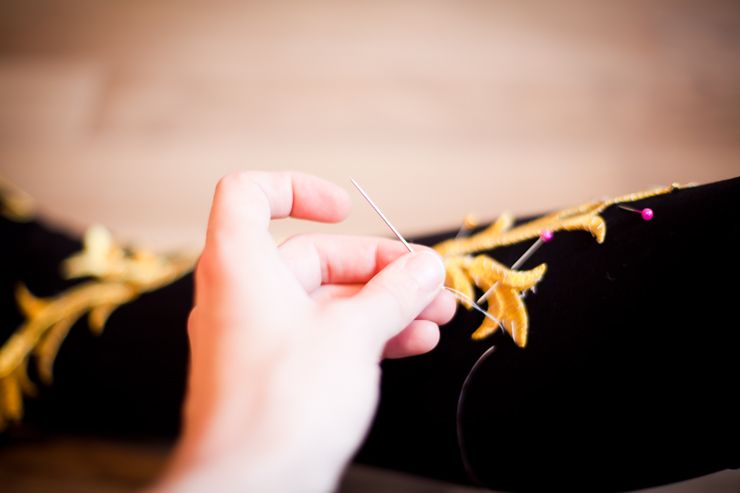
 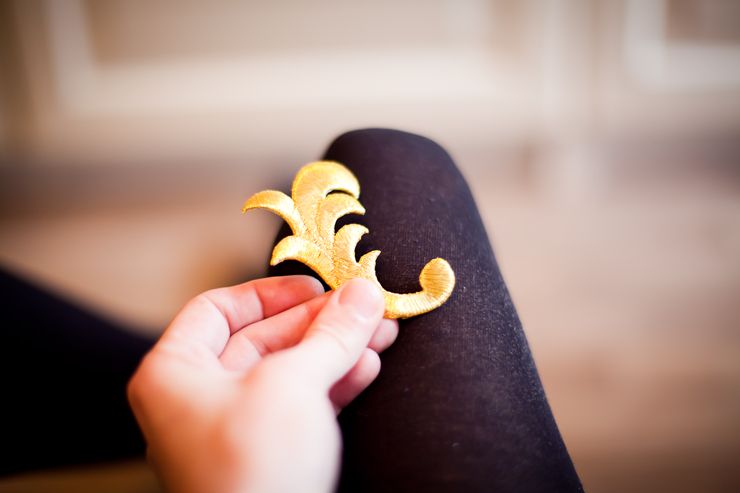 5) PinningLoosely Pin the Motifs the way you like it! I worked on 1 leg first ( my Right Leg) since I will mirror reflect the Motifs later on on the other leg! Keep looking in the mirror to make sure everything looks good and change things while you still can! I like to do this while I wear the tights since its the best way to see how the outcome will be! I guess with T-Shirts or Skirts you can work on the items while not wearing them.
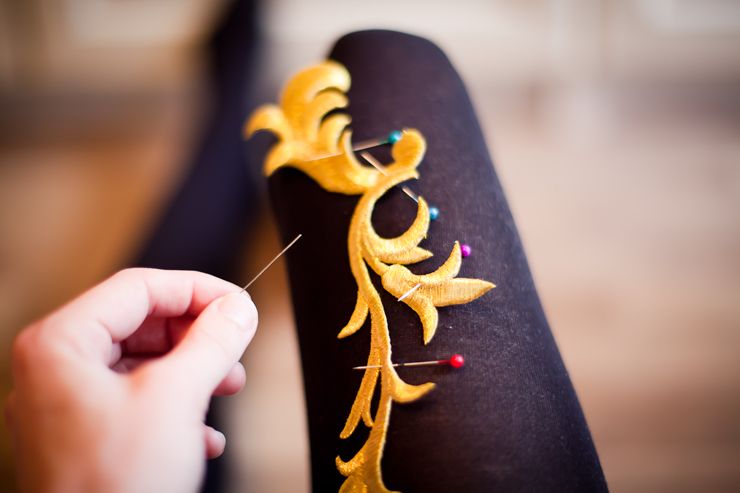 6) Attaching the MotifsAlthough the Motifs are Iron On I really prefer sewing for a more beautiful look but it's really up to you what you want to do! I think Ironing will be as painstaking as sewing and glueing will prob be a hazard too since you would have to be careful not glue the front and back legs to one another ;)I worked on 1 leg, my right leg, completely finishing one leg first before I reflect the same on the other leg!
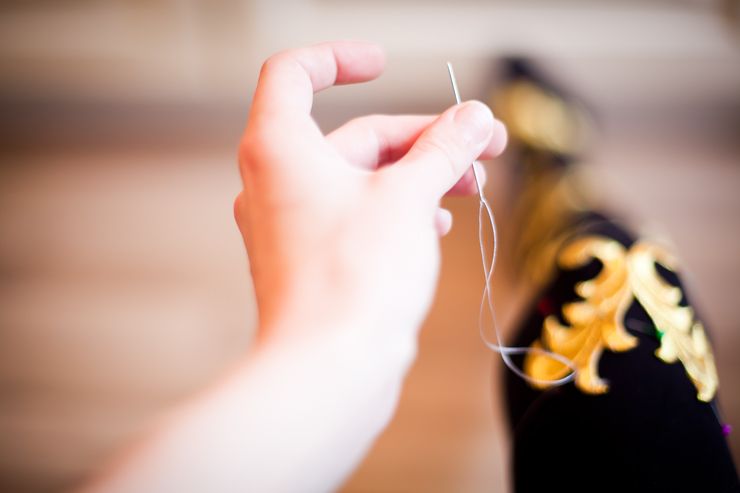
7) Repeat the Process on the other Leg!All done with one leg? and still alive? Repeat the entire process on the other leg by looking in the mirror when placing and pinning the Motifs for a perfect mirror reflected look (symmetry example here)!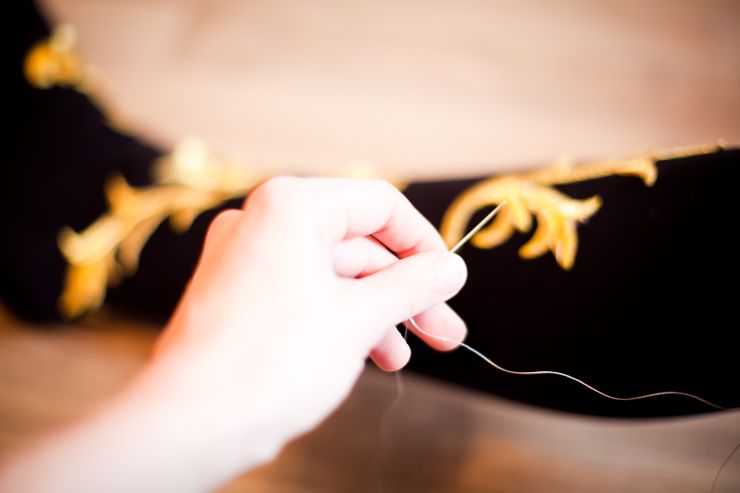 8) Your Ready!!jayyyyyxoxo
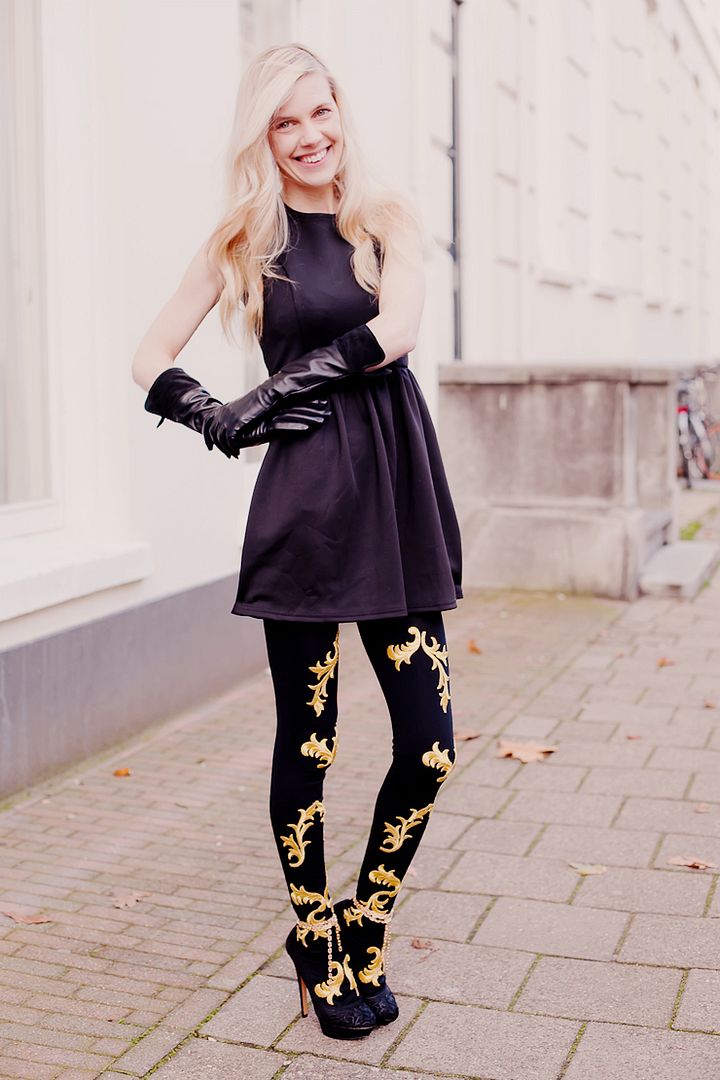
 FOLLOW COCOROSA ON BLOGLOVIN' FACEBOOK AND TWITTER